Nothing beats the look of beautiful nails. However, getting your nails done can really break the bank over time. Save $1,000 a year by doing your own fingernails at home with today's guide on how to do dip nails at home (and make them actually look professional).
They say you can tell everything about a girl just from the look of her nails. If you think about it, it's usually true.
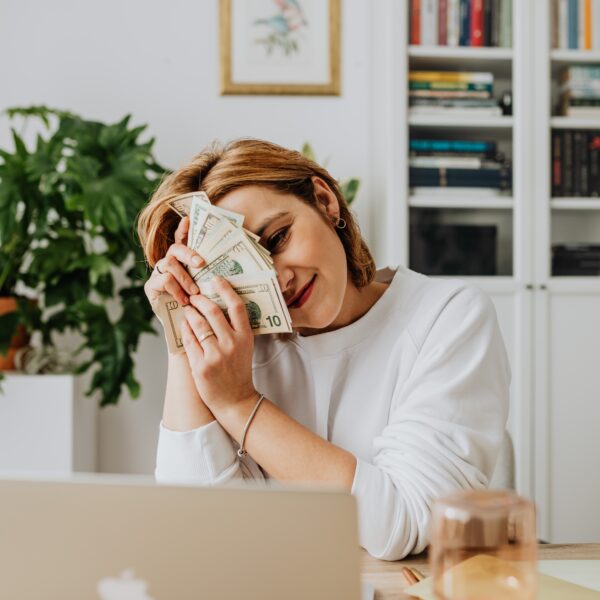
However, as much as I love the look of nails done by a nail salon, they can be extremely pricey over time. I found I was spending $1,126 a year on my dip fingernails and $953 a year on my gel toes! That's over $2,000 a year! Over 10 years, that's $20,000! However, if I invested the “nail money” I was spending every 3 weeks and put it into the stock market, after 20 years, I'd have $102,491! After 30 years, I'd have $259,144! (and yet over 30 years, I would have only put in $62,400) That's the power of compound interest!
Check it out for yourself in a compound interest calculator, linked here for you. The stock market makes 8% per year on average. It's actually sickening when you realize how much we pay for all the maintenance we require.

Okay, sorry to get all nerdy, but it's changes like this in life that do change your life.
Other money saving recommendations:
- 9 Money Saving Tips to Increase Your Savings Immediately
- 15 Cheap DIY Home Decor Ideas You Need to Try
By doing my nails and toes myself, I put that money into the stock market instead so that my money can compound and make me more money.
(I'm not cheap and my life from the outside probably LOOKS expensive…little do people know that I save like a mad woman on everything and I invest that money into the real estate and the stock market. Actually, who am I kidding, anyone that knows me knows this quality in me, but people that don't know me personally would have no idea. That's the goal here ladies. Don't compromise your lifestyle to save money. Let's have the lifestyle and accomplish the things we want (vacations, home, nice clothing), let's just get smart about how we do it.)
Therefore, over the last five years, I've perfected the DIY dip nail (tutorial below) and DIY gel nail from home to save money. This is a step by step tutorial on how to do dip nails from the comfort of your own home and save a lot of money. I do dip on my nails and gel on my toes.
If you'd like to see the tutorial for professional salon quality gel nails at home to save an additional $2,000 a year, you can learn those steps here.
Recommended for You:
- Ultimate List of 50+ Things You Should ALWAYS Buy at Dollar Tree
- Eco-Friendly Ways to Save Money: Ultimate List
- How to Make A Bed Look Luxurious on A Budget
Why Should You Have Your Nails Done?
A first impression is EVERYTHING. They say people form an opinion of you within 3 seconds of meeting you based on appearance (including nails), personality, and body language.
Believe it or not, your nails could actually have an effect on first impressions at job interviews for both men/women.
TFC Tip: Having nicely groomed or painted nails is critical in the business environment. (No chips, ladies!)
I mean, who wants to hire the person with dirt under their nails?
It sends a bigger message to the interviewer. Since the candidate didn't take the time to clean their nails, the interviewer may think their attention to detail in the workplace may not be up to par either. (This applies to most jobs, but there are exceptions like construction and other trades where it wouldn't matter as much.)
In addition to the work place, I believe you can tell a lot about a woman just by what her nails look like in any setting (relationships, dating, friends, customer service, etc)
Think about it.
Women with chipped nail polish, super long nails, white tip nails, normal length nails, tie-dye nails, non-painted nails, colorful nails, glittery nails, stick on nails, or short tip nails…they all have a particular personality association (typically).
Don't get me wrong…I've had my fair share of chipped nails! We all have! For the most part, though, you can tell a lot about a woman.
How Much Money Will You Save by Doing Your Own Nails?
I used to invest in getting my nails done because I do believe a well-manicured nail positively impacts my life, both in my career and my first impressions with people.
When I have my nails done, I feel more put together when they look flawless and I feel better about myself. I find that even when I'm in yoga pants at the gym covered in sweat, having a shiny beautiful nail makes me feel feminine and sexy.
Plus, I work for a Fortune 500 company and meet with global organizations on a daily basis so I need to look professional.
Therefore, a beautiful nail is a MUST in my life.
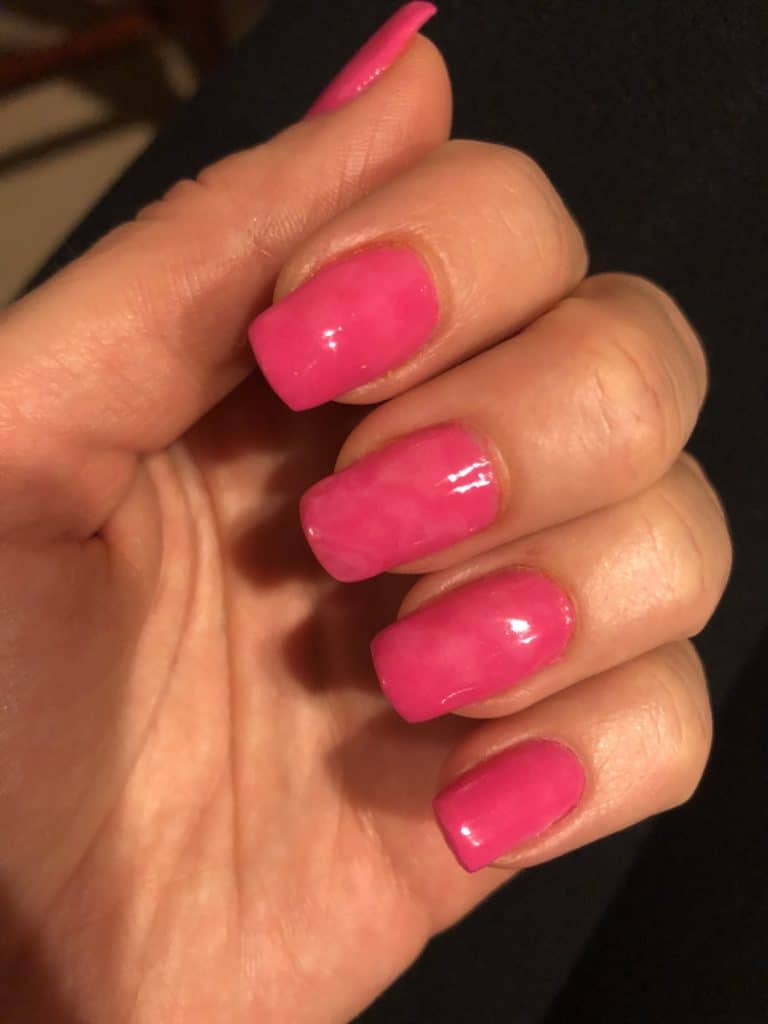
However, getting your nails done every three weeks can get expensive quickly. I had gotten them done for years at nail salons, until I calculated how much I was spending.
I was spending $65 every three weeks on getting my nails done. (Honestly, that's probably low compared to what many places charge. Once you tip and do a party nail, it can get to $75 easily.)
I realized I was spending $1,000 per year just on my nails. That amounts to over $5,000 over the last 5 years just for my fingernails!
Not to mention, I was spending another $55 every 3 weeks to get my toes done! All together, I was spending over $2,000 a year on toes and finger nails, which amounts to over $10,000 over the last 5 years!!
HOLY SMOKES!!! That's ridiculous. I could buy a car for that! There must be another way! I wanted to invest that money in the stock market so it could earn interest over the years and make me money, instead of going down the drain.
I decided I needed to take it in-house and do my nails at home to save money. How hard could it be?
My Journey to Learning How to Do Dip Nails
Well, let me tell you, finding the right products to do my own nails was VERY difficult. I had to spend the time trying things and then wait a week or two to see how they held up.
It was all smooth sailing. NOT!
I found it was actually quite hard to do professional nails from home when you have no idea what you're doing! Who knew!?
I tried many different products, different techniques, and finally came into a rhythm.
I have now been doing my own dip nails on my fingertips and gel nails on my toes for 3 years now.
Not only do my at-home nails look professional, they're extremely cheap!
Pros and Cons of All DIY Nail Techniques at Home
I mentioned I've tried EVERYTHING on my nails and toes over the years so I figured I'd break down the pros and cons of each technique in case you are looking for all options.
I currently do dip on my fingers and gel on my toes. Scroll down for the dip tutorial and go here for the gel tutorial.
All DIY Nail Techniques:
- Regular Nail Polish
- Sally Hansen Gel Nail Polish (no UV light needed)
- Regular Nail Polish with Gel Topcoat
- Pink and White Acrylic Tip Set
- Glue-On Full Nail Tips Painted with Regular Nail Polish
- Glue-On Full Nail Tips Painted with Regular Nail Polish and Gel Topcoat
- Glue-On Full Nail Tips Painted with Gel
- Gel Nails
- Dip Powder Nails
Regular Nail Polish Technique
- Time: 10-15 minutes
- Difficulty: Easy
- Lasts: 5-7 days
I had tried using regular nail polish on my toes and fingernails, but that always chipped within a few days for me. The toes would last longer, but they weren't shiny like gel and chipped too easily.
Sally Hansen Gel Nail Polish (no UV light needed)
- Time: 10-15 minutes
- Difficulty: Easy
- Lasts: 5-7 days
Honestly, I was really hoping this nail polish was the easy alternative to beautiful shiny gel nails. They claimed it was shiny like gel and long lasting. Unfortunately, I struck out on this one too. It acted like normal nail polish for me, so it chipped quite easily and quickly.
Regular Nail Polish with Gel Topcoat
- Time: 15-20 minutes, but with a 24 hour wait time between regular and gel coats
- Difficulty: Easy
- Lasts: 10-15 days
Ok, ladies. This does work, BUT there are some caveats.
You have to wait 24 hours after putting the regular nail polish on before you can add the gel topcoat. Also, it doesn't have the long-lasting effect that an all-gel nail will. It will by shiny and pretty like gel nails and will last longer than normal nail polish, but not nearly as long as an all-gel nail.
The gel topcoat will still require a UV light and 30-60 seconds to cure on each hand.
Pink and White Acrylic Tip Set
- Time: 3 Hours
- Difficulty: Very Hard
- Lasts: 2-3 weeks
This is the technique where the white tips are glued to the tip of your nail with both a pink and white acrylic applied.
I kid you not. This technique is EXTREMELY difficult. The nail professionals make it look so easy, but it's definitely not. I was determined to learn, but I finally decided that keeping all my hair (aka not ripping it out from frustration) was more important. =)
It's been a few years since I've tried this technique again, but I had tried for several months and wasn't able to achieve the professional look I wanted. I'd still recommend going to the nail salon for this type of nails, unless you have a lot of patience.
However, I do have a way to achieve the same look using dip, which can be found in my nail dip tutorial.
Glue-On Full Nail Tips Painted with Regular Nail Polish
- Time: 30 minutes
- Difficulty: Easy/Intermediate
- Lasts: 7-15 Days
This technique is actually one of my favorites, especially for beginners. It's extremely easy, involves only a little filing, and the regular nail polish actually stays on about 7-15 days. With this technique, the nail polish may not be as shiny as gel and may start to chip or dull after 7-15 days, but for the amount of time, the professional look you will get is amazing!
Glue-On Full Nail Tips Painted with Regular Nail Polish and Gel Topcoat
- Time: 30 minutes plus 24 hours between regular and gel polish
- Difficulty: Intermediate
- Lasts: Approx 2 weeks
This is a technique I used for several months and loved it. The nails look completely professional, it's easy to do and I have a plethora of regular nail polish, so I always have a lot of colors to choose from!
However, since these nail tips are glued on, they may start popping off 2 weeks later. They don't last as long as I like and I do have to be careful with pounding my fingers against things through the day as a hard hit or heavy gardening could result in a nail popping off.
However, this is my favorite nail technique when you need to do them quickly and want a professional, great look!
Glue-On Full Nail Tips Painted with Gel
- Time: 30-50 minutes
- Difficulty: Intermediate
- Lasts: Approx 2 weeks
I used this technique for about a year and loved it for my nails. It's pretty easy to do and the nails come out nearly perfect every single time.
I still do this technique if I'm in a crunch for time and don't have time to do dip nails.
Gel Nails
- Time: 25 minutes
- Difficulty: Easy/Intermediate
- Lasts: Approx 10 days
I love the look of a gel nail. However, I find that doing gel on my fingernails at home (and in the salon) only lasts about 7-10 days before nails start peeling off. However, when doing it on my toes, it lasts for at least a month or longer.
The tutorial on exactly how I get my toe nails to look like professional salon quality with gel can be found here.
Like I mentioned, I only go gel on my toes since I find that the gel isn't strong enough to protect the finger nail so I still would get broken nails and chips. (I'm a big outdoor adventure girl so I put them through the ringer at the beach and in the ocean.) Once they start peeling and lifting, they look terrible and need to be removed so I stopped doing this technique on my fingernails and I solely do this technique on my toes.
Dip Powder Nails
- Time: 60 minutes
- Difficulty: Hard
- Lasts: 3-4 weeks
Ok, ya'll! While the learning curve for dip powder nails at home is a longer learning curve, it's SO WORTH IT!! This is now my favorite way to do nails at home.
My nails are strong and hard for 3-4 weeks before they start lifting (just like in the salons). In addition, my nails don't break and they are constantly long so people are always surprised when I tell them they are my real nails since they look like acrylics!
There are 2 downsides of DIY dip nails. One downside is that taking them off is tedious and patience is a virtue. (You'll need a glass of wine and a Bravo show for it.) The other downside is that they do have a steeper learning curve to get them to look perfect, but once you get the hang of it, it's super easy! Don't give up!
They take me 90 minutes to complete. However, 90 minutes is the same amount of time it takes in the nail salon so I'd rather be at home in my jammies watching The Bachelor while I do them with a glass of wine and a face mask. =)
Since dip nails are my favorite way to get professional-looking nails, my tutorial below will be about how to dip your own dip nails at home.
Benefits of Dip Powder Nails
DIY dip powder nails have been my go to nail for all of 2020. Due to the above reasons, I've been doing my own dip nails for almost a year now.
I always get compliments on them. The nails are not brittle, nor do they chip. My nails actually grow extremely long with dip powder and don't get damaged whatsoever. In fact, I have the same long nails I used to have with acrylic tips, except they are my REAL nails! People are always shocked when I tell them they're my actual nail.
My dip powder nails are shiny and they look professional, clean, and classy.
How to Do Dip Nails at Home (and Make them look Professional!)
Alright, so I've tried anything and everything over the last 10 years (as you can see from my list above). For me, dip nails have proven to look the most professional, clean and classy for my fingernails while providing the longest wear.
Over the last year, I have PERFECTED how to do my own dip nails at home. I've watched so many tutorials and tried so many different products, but I've tested my technique the last year and I can truly say I've got the exact combination down.
Let's get started!
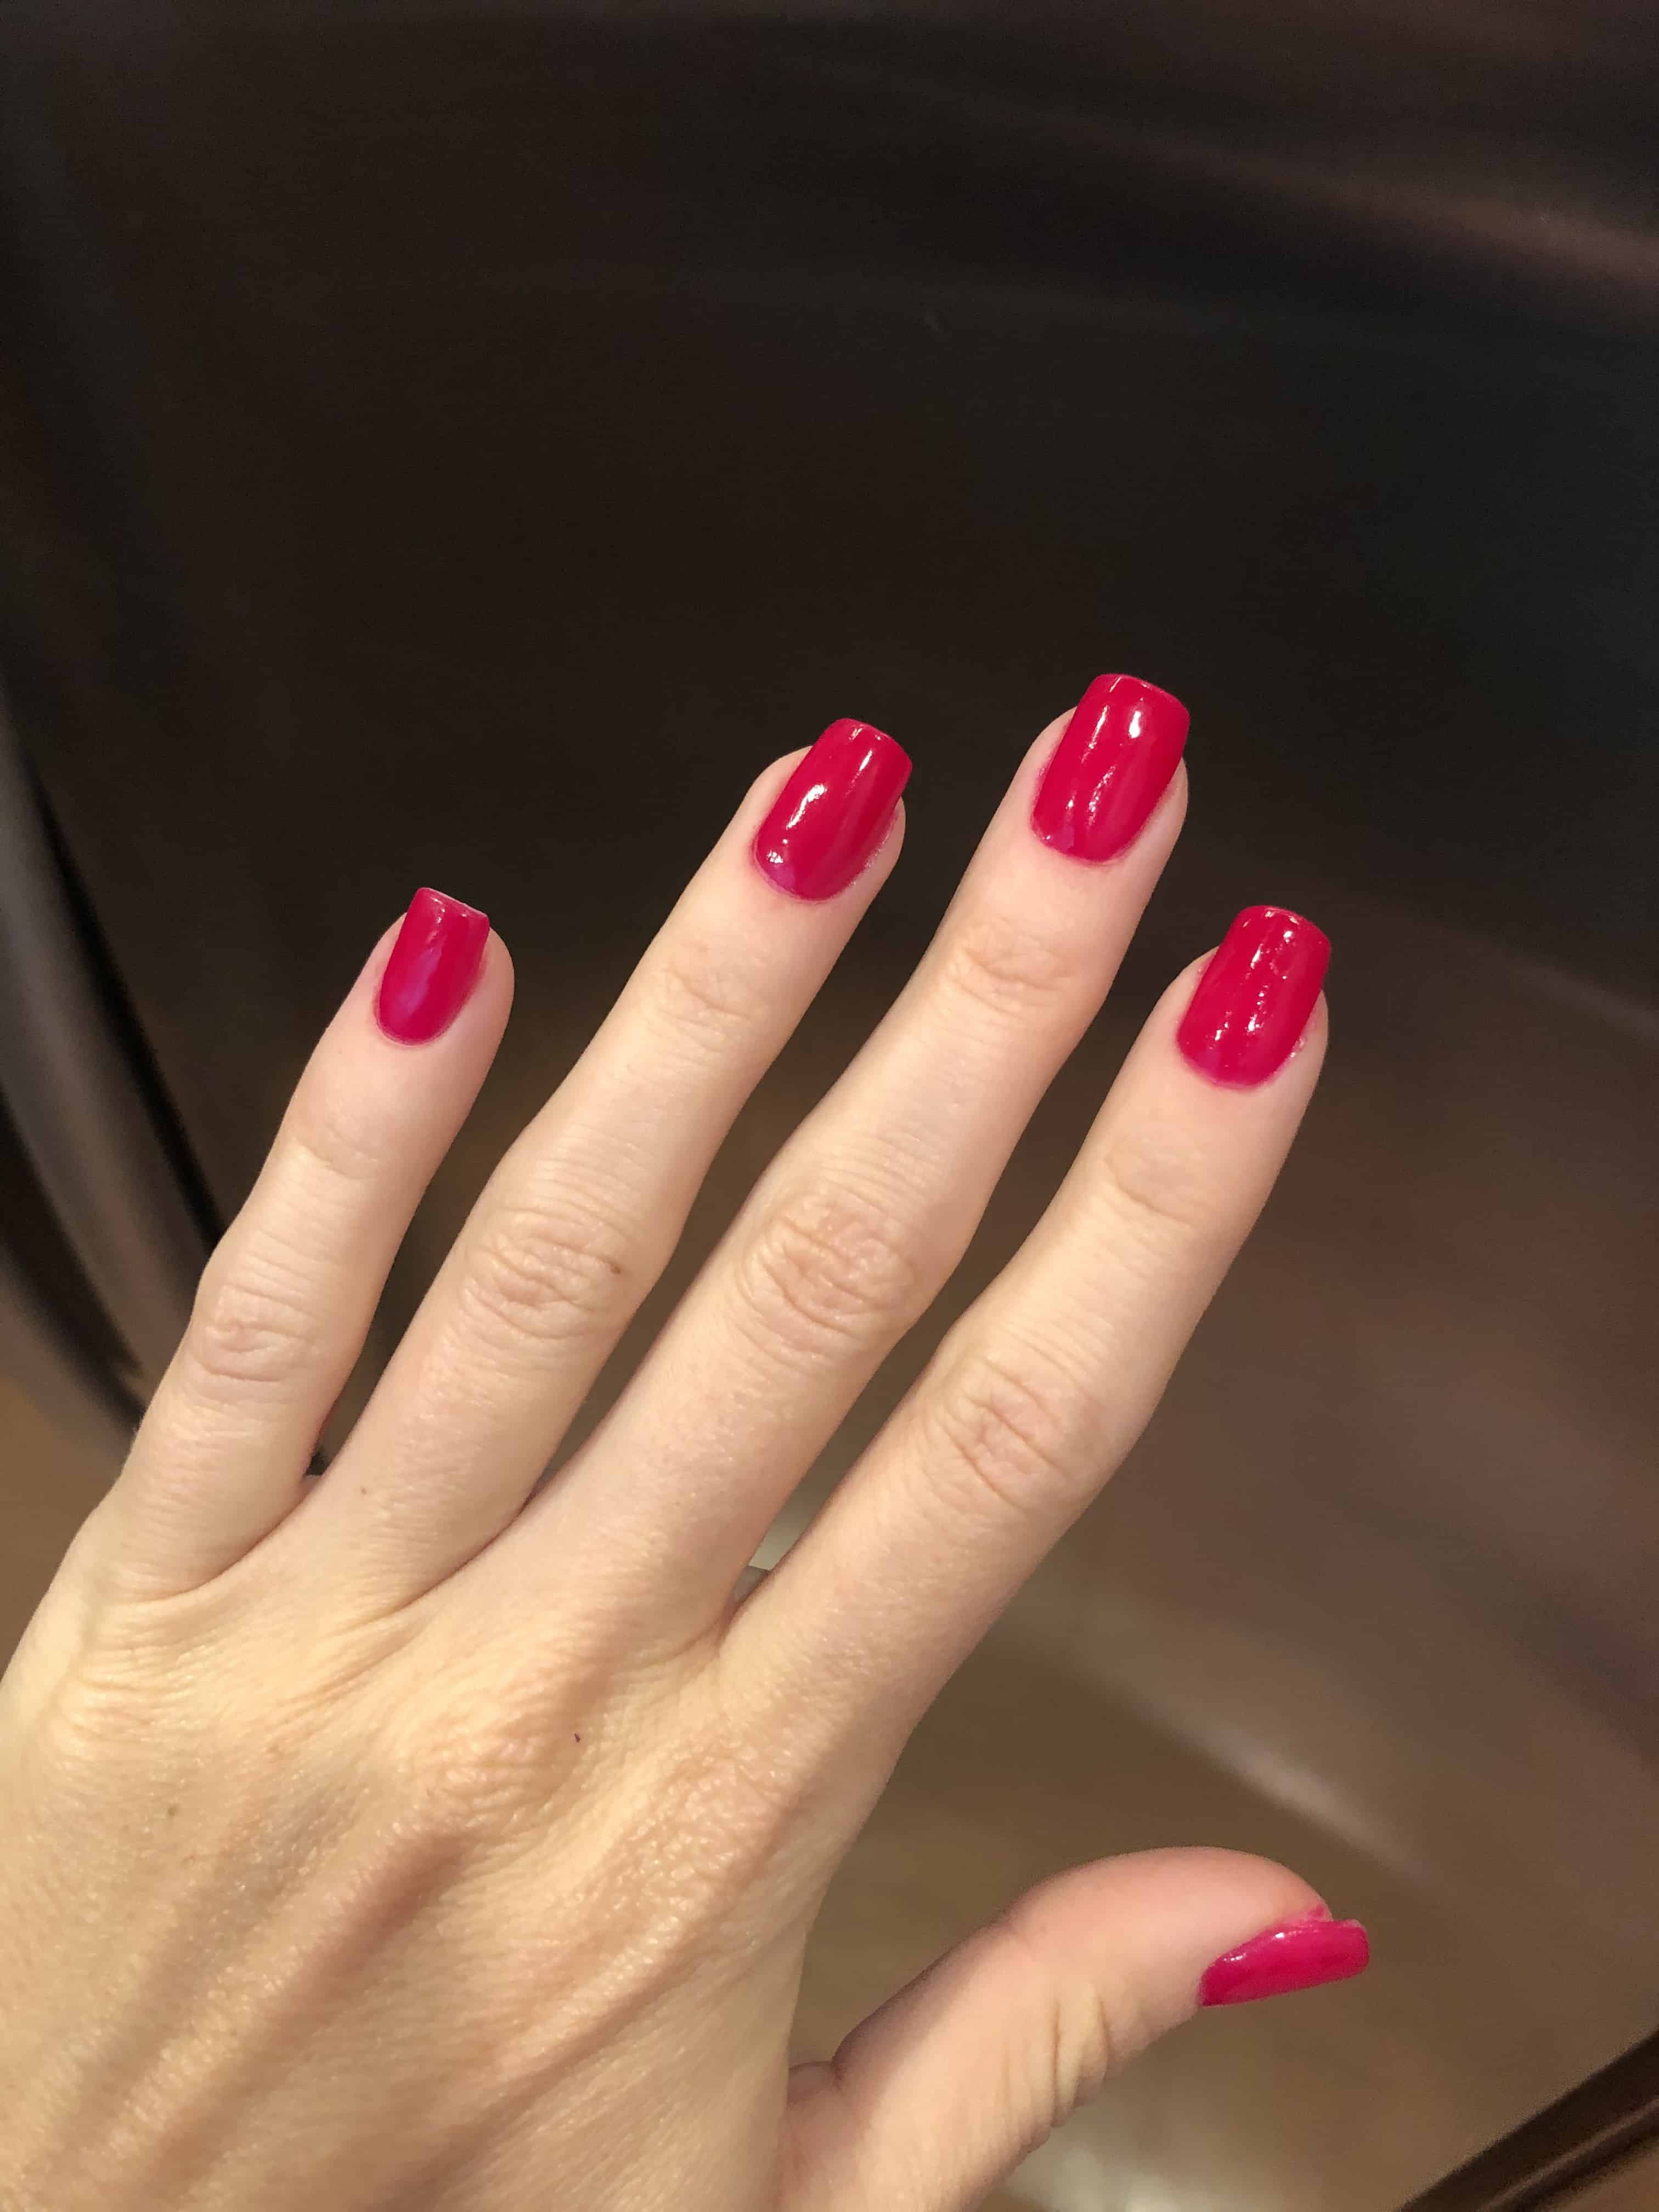
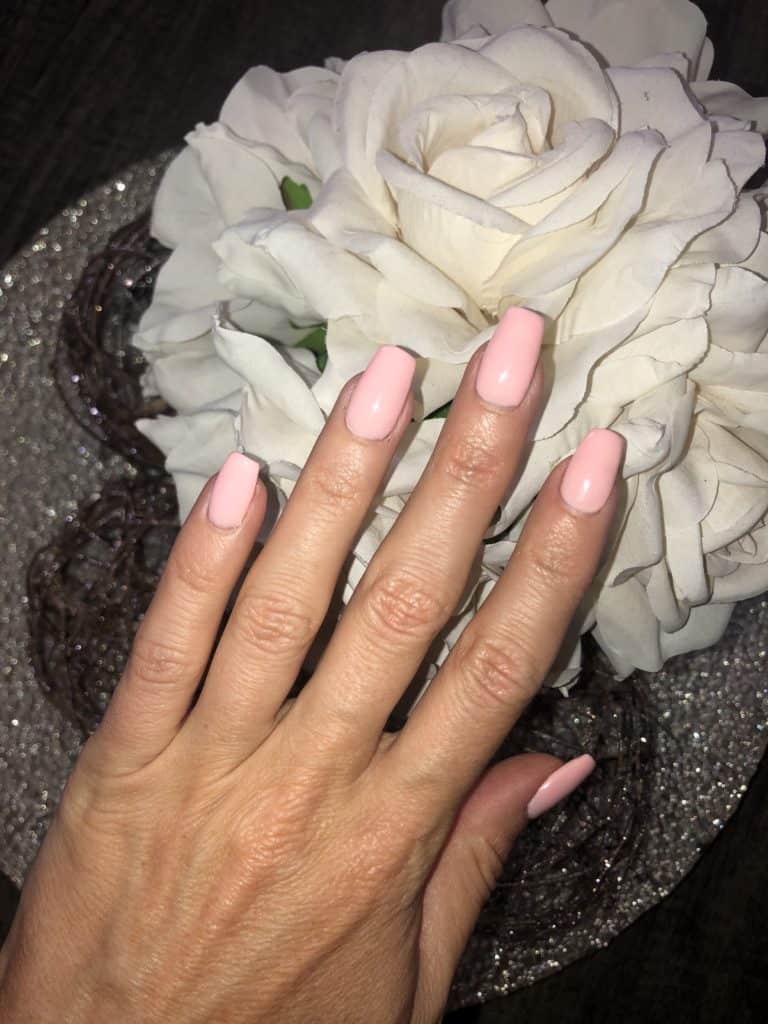
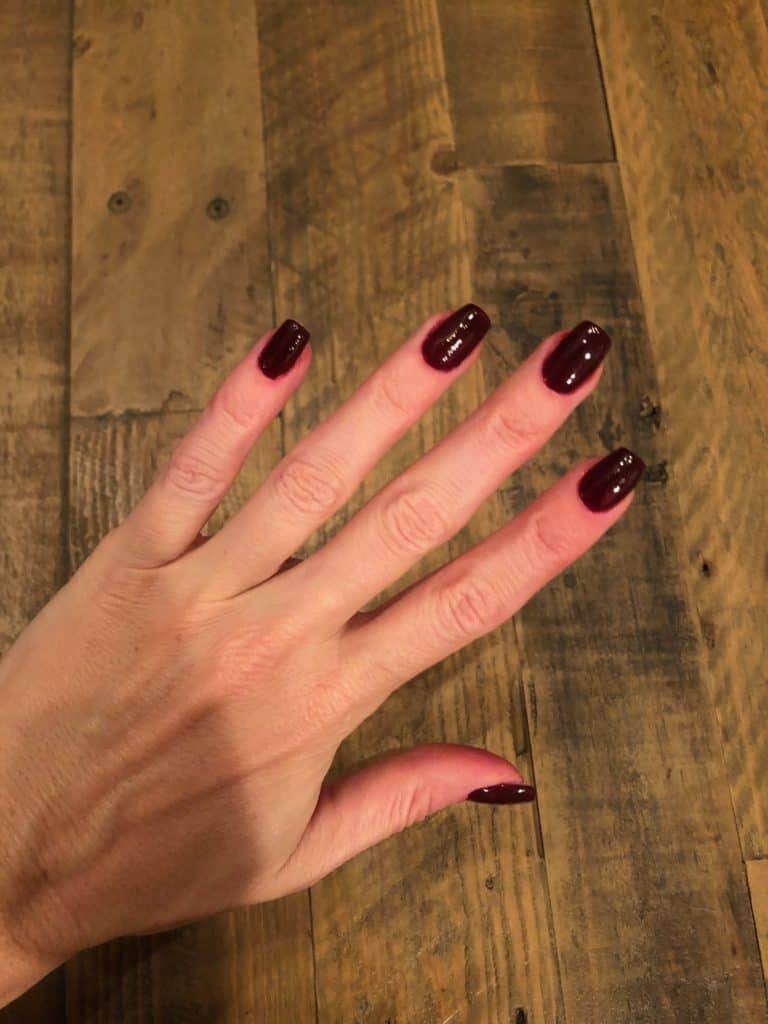
This is the finished look! Professional and classy!
Items Needed for All Steps:
I started this process in January of 2020 and do my nails every 3 weeks. I still have plenty of everything left, especially the powders, so the items last a while. The investment up front is about the same cost as 1 visit to the nail salon. If you do your toes too (with gel), then every item up front is already saving you money!
- Acetone
- Cotton Balls
- Nail clips (to take dip off after)
- Puffy Brush to wipe the extra dip powder off
- Electric File or regular file (I use both)
- ph Bond for gel nails
- Kiara Sky dip powder set- bond, base, seal & protect
- Kiara Sky Non-Wipe Gel Topcoat
- Clear Powder (can be optional)
- Colored Powder-my faves are deep burgundy, light pink, lipstick red and a bright raspberry.
- UV Nail lamp light
Step 1: Remove Existing Nail Polish
For this step, remove your existing nail polish.
- If you just have a bare nail, skip to step #2.
- For regular nail polish, go ahead and use acetone or nail polish remover like you normally would.
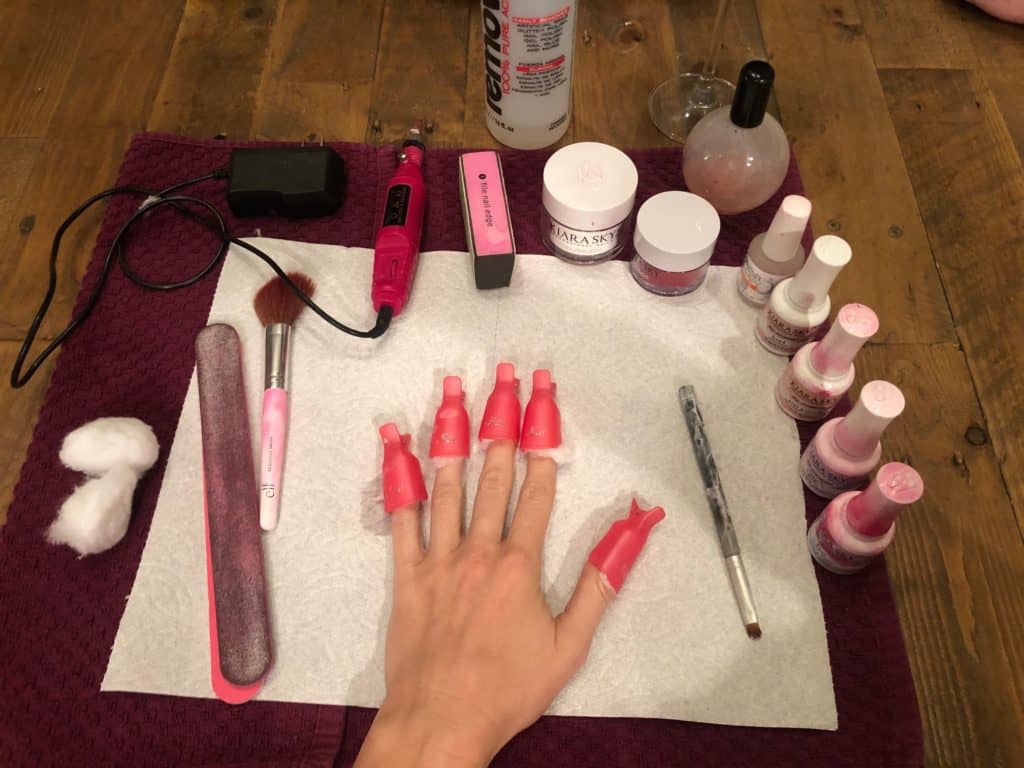
- If you have dip powder or gel polish on, you'll want to get cotton balls, acetone, and a holder (foil or nail clamps).
When I first started, I used foil for this process, but the acetone was leaking everywhere and it was tough for me to fold the foil on my own.
Instead, I got these super cheap nail clips that hold the cotton balls for me. GAME CHANGER!!! I look like a freak (aka gorgeous queen), but I can sit on the couch with a cocktail and watch a show while the acetone does its magic. My man finds it quite entertaining to see the nail clips on me. =P
I soak the cotton balls in acetone, put the cotton ball on my nail and then clamp them with the nail clips.
I then watch a TV show for 30 minutes while I wait for the gel/dip powder to soak off.
Items Needed:
- Cotton Balls
- Acetone
- Foil or Nail Clips
Step 2: Rough the Surface of Your Nails
Once you have a bare nail, it's time to rough up the surface it prepare it for the dip powder.
For this step, I'd recommend getting an electric tool like the one I have below.
However, I believe you could get the same effect by using a nail file. You'll just want to make sure to do an extra good job of roughing up the nail.
Items Needed:
- electric nail file or regular nail file
Step 3: Apply pH Bond (important step)
Ok, this is a step I've never seen before on any of the DIY dip nail tutorials. However, when I try the dip nail techniques without using this, they only stay on for a week before they start lifting.
This is a CRUCIAL step so do not skip it.
Place phBOND on your entire nail.
Items Needed:
- ph Bond for gel nails (yes, I know this tutorial is for dip nails, but this is what has worked for me best so I use the ph bond for gel nails, which is the same one I use to do my gel toenails. I had it already so I tried it and that's how I figured out that the dip nails will stay on so much longer with this on first.)
Step 4: Apply Regular Bond
Ok, below are the exact products you'll need for the next couple of steps. I use the Kiara Sky Dip Essentials Kit because it's the one I've found the best success with AND it's super cheap!
In this step, just put a layer of the “bond” all over every nail. (Different from step 3).
Side note: BOTH bonds are CRITICAL to use!
Items Needed:
- Kiara Sky Bond
- Kiara Sky Base
- Kiara Sky Seal & Protect
- Kiara Sky Top Coat (optional). If you like a shinier nail (like gel), I have something else for that I'll explain below. This didn't get my nail shiny enough for me.
Step 5: Apply Base and Clear Powder (can be optional, read below)
Alright, now you will apply the “base” to 3/4 of the nail and then immediately dip your nails into the Clear Powder. (You will be using the “base” in a lot of the steps below so keep it nearby and ready)
Wait a few seconds and then brush off the excess powder.
(You could get away with not doing this step and instead just get straight to doing an additional step of the color powder. Up to you and to save money, you could skip the clear powder.)
Items Needed:
- Clear Dip Powder
Step 6: Apply Base and Colored Powder
Next, you will apply the “base” to 3/4 of the nail and then immediately dip your nails into the colored powder of your choice.
My 3 favorite colored powders that have had good results are below.
Wait a few seconds and then brush off the excess powder.
Items Needed:
- Colored Dip Powder. I've linked some of the professional-looking dip colors I've had good success with below.
Kiara Sky Victorian Iris
Kiara Sky- Chi Chat
SNS- Color 314
Step 7: Apply Base and Colored Powder Again
This time, you will apply the “base” to the entire nail and then immediately dip your nails into the colored powder.
Wait a few seconds and then brush off the excess powder.
Step 8: Repeat Step 7
Yes, just repeat step 7 and apply the dip to the whole nail. Brush off excess
Step 9: Seal & Protect
Apply the seal & protect polish to all of the nails.
Let it dry for about 2 minutes.
Step 10: Shape and Buff
Now, you'll need your electric file or regular file to shape and buff your nail to exactly what you're looking for.
This is a VERY key step because you want to make sure the nail is EXTREMELY smooth. Otherwise, it won't have the professional look you're seeking.
Use the nail file or electric nail file on every part of the nail and make sure it feels rough.
Step 11: Apply Gel Top Coat
Once you're done shaping the nail, you're ready for the fun part.
DO NOT add the seal & protect again. It will make your nail too smooth for this part. Instead, apply 1 layer of the gel top coat I have below and cure it under a UV light for 60 seconds.
Regular gel top coat was peeling off in a few days so you have to use this non wipe gel topcoat so that it stays shiny and perfect on your dip nail.
Items Needed:
- Kiara Sky Non-Wipe Gel Topcoat
- UV Light Nail Lamp
That's it! You're done!!
DIY Dip Nails at Home to Save Money
VOILA!
You now have beautiful, professional-looking nails!
If you don't get the exact look you're going for the first time, don't get frustrated! It may take a few times to get in the groove and learn what works best!
Keep trying. The cost savings over time is so worth the time you put in now. I always see the learning process as an investment in myself.
I save over $1,000 a year just by doing my dip nails at home and another $1,000 a year by doing my gel toes.
If you'd like to see the tutorial for professional salon quality gel nails at home to save an additional $2,000 a year, you can learn those steps here.
If you tried my tutorial on how to do dip nails, let me know in the comments below or send me an email with a picture of the outcome! =)
Recommended for You:
- Ultimate List of 50+ Things You Should ALWAYS Buy at Dollar Tree
- Eco-Friendly Ways to Save Money: Ultimate List
- How to Make A Bed Look Luxurious on A Budget
- 15 Cheap DIY Home Decor Ideas You Need to Try


Leave a Reply